
Discover the secret behind a delicious and healthy whipped garlic hummus recipe that’s perfect for any occasion! Inspired by a memorable dining experience at a Middle Eastern restaurant in Detroit. In addition, learn how to make this healthy and flavorful dish from the comfort of your own kitchen. With a few simple ingredients and a food processor, you can recreate the silky, creamy texture and balance of flavors that make this whipped garlic hummus so irresistible.
One morning, I enjoyed dining at a Middle Eastern restaurant in Detroit with a client for a business lunch. As we perused the menu, I couldn’t help but be amazed by the various appetizers and side dishes it offered. It included a whipped garlic hummus made by an Iraqi old woman.
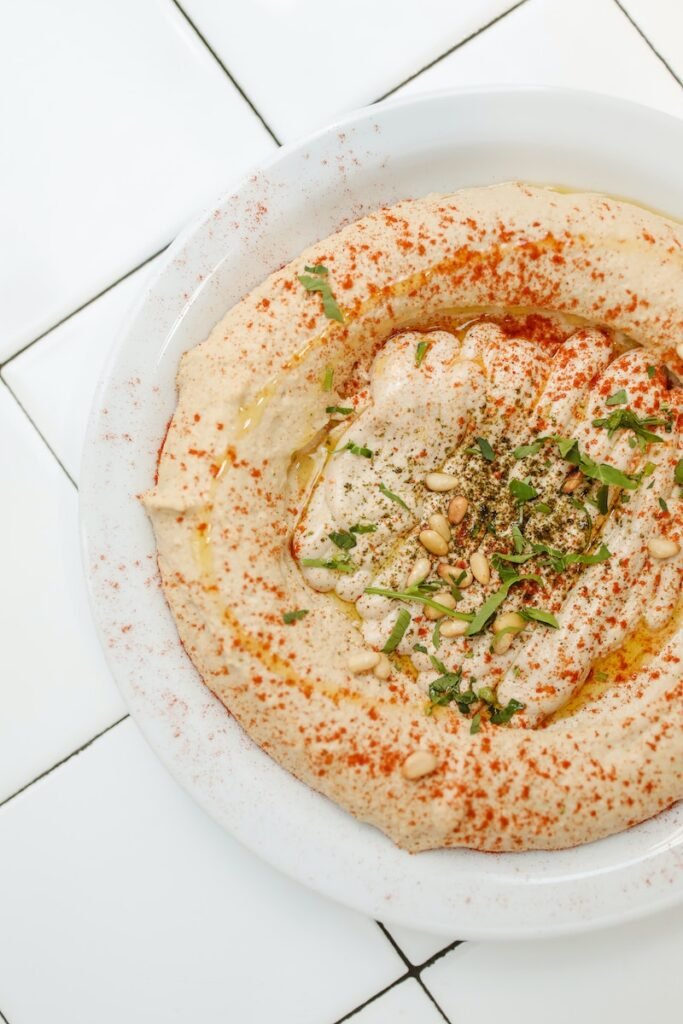
As we awaited our food, one of the servers gave a dramatic presentation of a dish. As a result, it made our dining experience even more enjoyable. Finally, our food arrived, and we received the most delicious and healthy hummus I had ever tasted. The whipped garlic hummus had the perfect balance of flavors, with just the right amount of garlic and lemon.
As we savored our meal, I couldn’t help but wonder how this Iraqi woman made this delectable hummus. When our server came by to check on us, I inquired about the recipe. At first, the server seemed hesitant to share the recipe, but after some convincing, he finally agreed to give it to me.
The server told me that the Iraqi woman has been making this it for years. She would soak the chickpeas overnight and boil them until they were tender. The chickpeas were then blended with tahini, garlic, lemon juice, and other ingredients until they were smooth and creamy.
The server also mentioned that gradually adding ice water while blending was key to making the hummus creamy. This technique helped to break down the chickpeas and create a silky, irresistible texture.
After getting the recipe, I was excited to try making the whipped garlic hummus at home. I couldn’t wait to impress my family and friends with this delicious dish. I followed the recipe to a tee, soaking the chickpeas overnight and boiling them until tender.
As I blended the ingredients, I added ice water gradually, just as the server had instructed. I couldn’t believe how smooth and creamy the whipped garlic hummus turned out. It was just as delicious as the hummus I had at the restaurant, and my family couldn’t get enough of it.
As I sat back and enjoyed the hummus with my family, I couldn’t help but be grateful for my experience at the Middle Eastern restaurant in Detroit. It was more than just a business lunch; it was an opportunity to try new foods and learn about different cultures.
Food can bring people together, and that’s exactly what happened on that fateful day. I was able to connect with my client over a shared love of food and learn about the traditional dishes of another culture. And, to top it all off, I could recreate one of those dishes in my own home.
To sum up, my morning at the Middle Eastern restaurant in Detroit was one of my most memorable dining experiences. Every aspect of the meal was perfect, from the dramatic food presentation to the delicious whipped garlic hummus. And, to top it all off, I took a piece of that experience home with me in the form of a recipe. I’ll never forget that morning, and I look forward to returning to the restaurant and trying more of its delicious dishes.
Here is how I create the healthy whipped garlic hummus in my kitchen.
Ingredients:
- 1 540ml can of chickpeas, drained and rinsed
- 5 tbsp lemon juice
- 4 tbsp cold water
- 4 tbsp olive oil
- 3 tbsp tahini
- 2 tsp granulated garlic
- 1½ tsp sea salt
How to create healthy whipped garlic hummus?
- You’ll need a few kitchen tools and ingredients to make this inspiring recipe for whipped garlic hummus. First, you’ll need a food processor with the “S” Blade attachment, which is essential for achieving the light and fluffy texture of the hummus. You’ll also need some basic ingredients, including chickpeas, tahini, garlic, lemon juice, olive oil, and salt.
- Drain and rinse the chickpeas thoroughly before adding them to the food processor. This will help remove any excess liquid or debris and ensure smooth and creamy hummus. Next, add the remaining ingredients to the food processor, measuring them accurately to ensure the right balance of flavors.
- Blend the mixture on high speed until all the ingredients are fully combined. This should take only a few seconds, but to achieve the light and fluffy texture, continue pulsing the mixture for 20-30 seconds or until the hummus is whipped. The longer you pulse, the smoother and creamier your hummus will be. You may need to stop and scrape down the sides of the food processor with a spatula a few times to ensure that all the ingredients are blended evenly.
- Once the hummus has reached the desired consistency, it’s time to serve. Enjoy the hummus immediately, or chill it in the refrigerator for a few hours before serving. Chilling the hummus can help the flavors meld together and create a smoother texture.
- If you have leftovers, store them in an airtight container in the fridge for up to five days. Whipped garlic hummus is a great addition to sandwiches, salads, or as a dip for vegetables. You can also experiment with different flavors and ingredients to create your unique hummus recipe. For example, add roasted red peppers or jalapeños for a spicy kick. This recipe is a great way to connect with others over a shared love of food and explore new flavors and cultures.
My experience at the Middle Eastern restaurant in Detroit provided me with a delicious meal and allowed me to learn about the traditional dishes of another culture. By recreating the restaurant’s whipped garlic hummus recipe in my own kitchen, I can continue enjoying that morning’s flavors and memories. I hope this recipe inspires you to try new foods and connect with others over a shared love of food!


